Debug in JetBrains IDEs
In this guide, we’ll be setting up JetBrains RustRover for debugging the Core Process of your Tauri app. It also mostly applies to IntelliJ and CLion.
Depending on which frontend stack is used in a project, the project directory may or may not be a Cargo project. By default, Tauri places the Rust project in a subdirectory called src-tauri. It creates a Cargo project in the root directory only if Rust is used for frontend development as well.
If there’s no Cargo.toml file at the top level, you need to attach the project manually. Open the Cargo tool window (in the main menu, go to View | Tool Windows | Cargo), click + (Attach Cargo Project) on the toolbar, and select the src-tauri/Cargo.toml file.
Alternatively, you could create a top-level Cargo workspace manually by adding the following file to the project’s root directory:
[workspace]members = ["src-tauri"]Before you proceed, make sure that your project is fully loaded. If the Cargo tool window shows all the modules and targets of the workspace, you’re good to go.
You will need to set up two separate Run/Debug configurations:
- one for launching the Tauri app in debugging mode,
- another one for running your frontend development server of choice.
- In the main menu, go to Run | Edit Configurations.
- In the Run/Debug Configurations dialog:
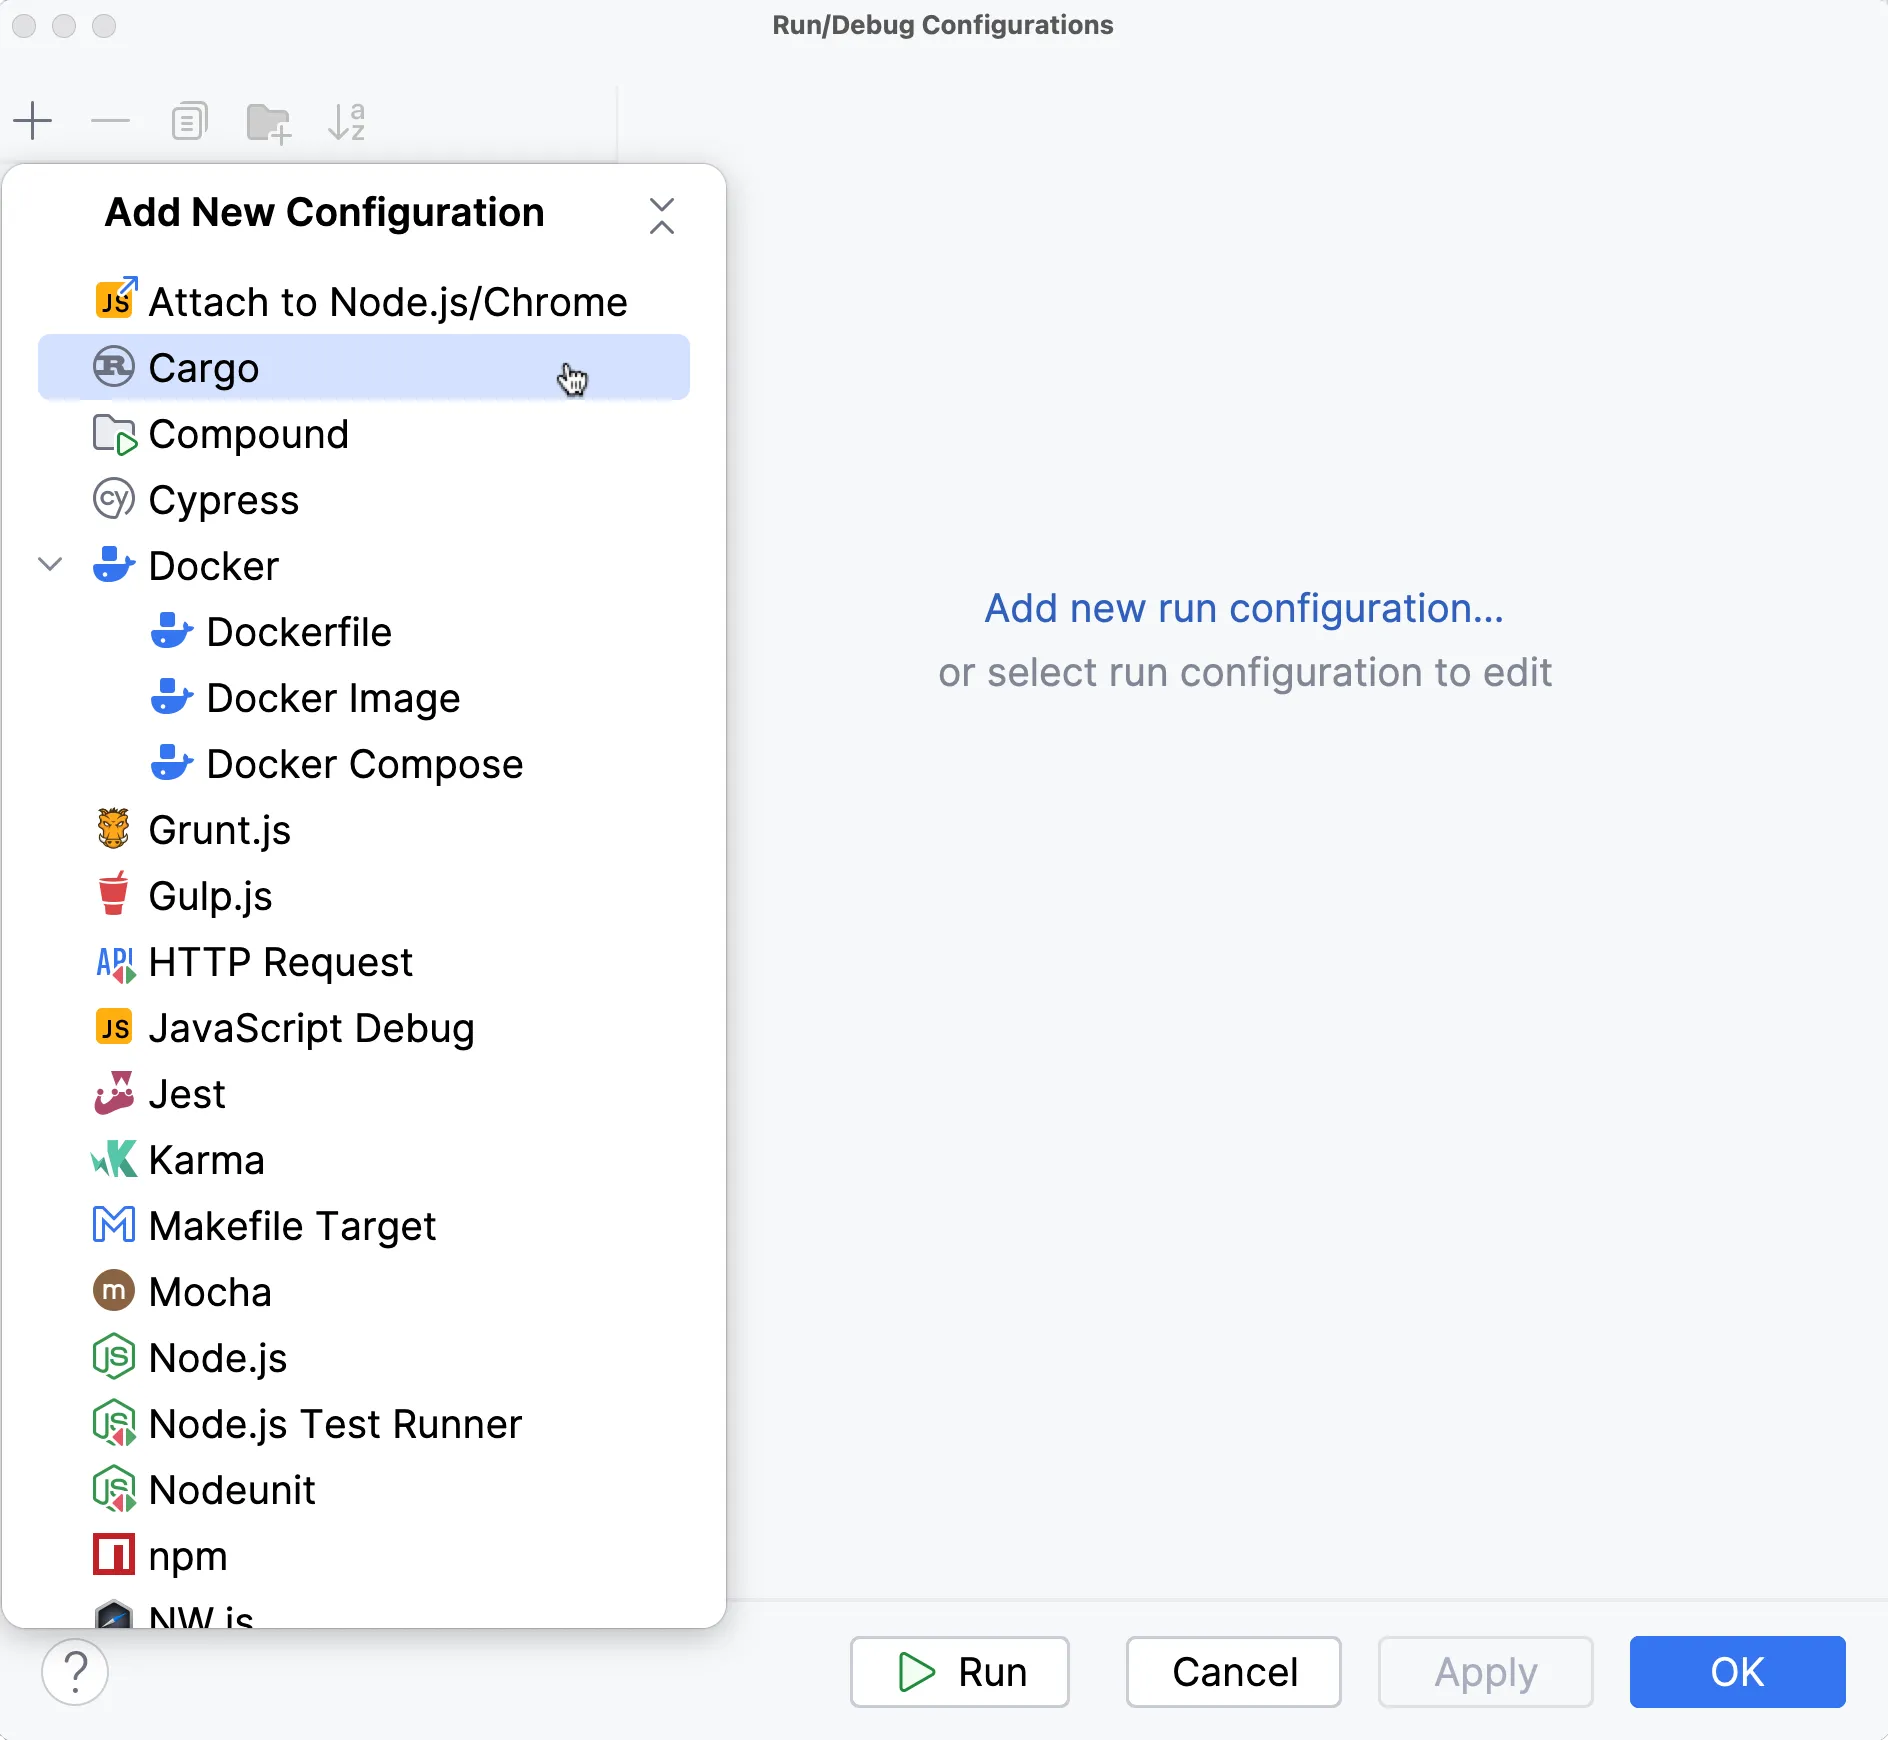
- To create a new configuration, click + on the toolbar and select Cargo.

With that created, we need to configure RustRover, so it instructs Cargo to build our app without any default features. This will tell Tauri to use your development server instead of reading assets from the disk. Normally this flag is passed by the Tauri CLI, but since we’re completely sidestepping that here, we need to pass the flag manually.

Now we can optionally rename the Run/Debug Configuration to something more memorable, in this example we called it “Run Tauri App”, but you can name it whatever you want.

The above configuration will use Cargo directly to build the Rust application and attach the debugger to it. This means we completely sidestep the Tauri CLI, so features like the beforeDevCommand and beforeBuildCommand will not be executed. We need to take care of that by running the development server manually.
To create the corresponding Run configuration, you need to check the actual development server in use. Look for the src-tauri/tauri.conf.json file and find the following line:
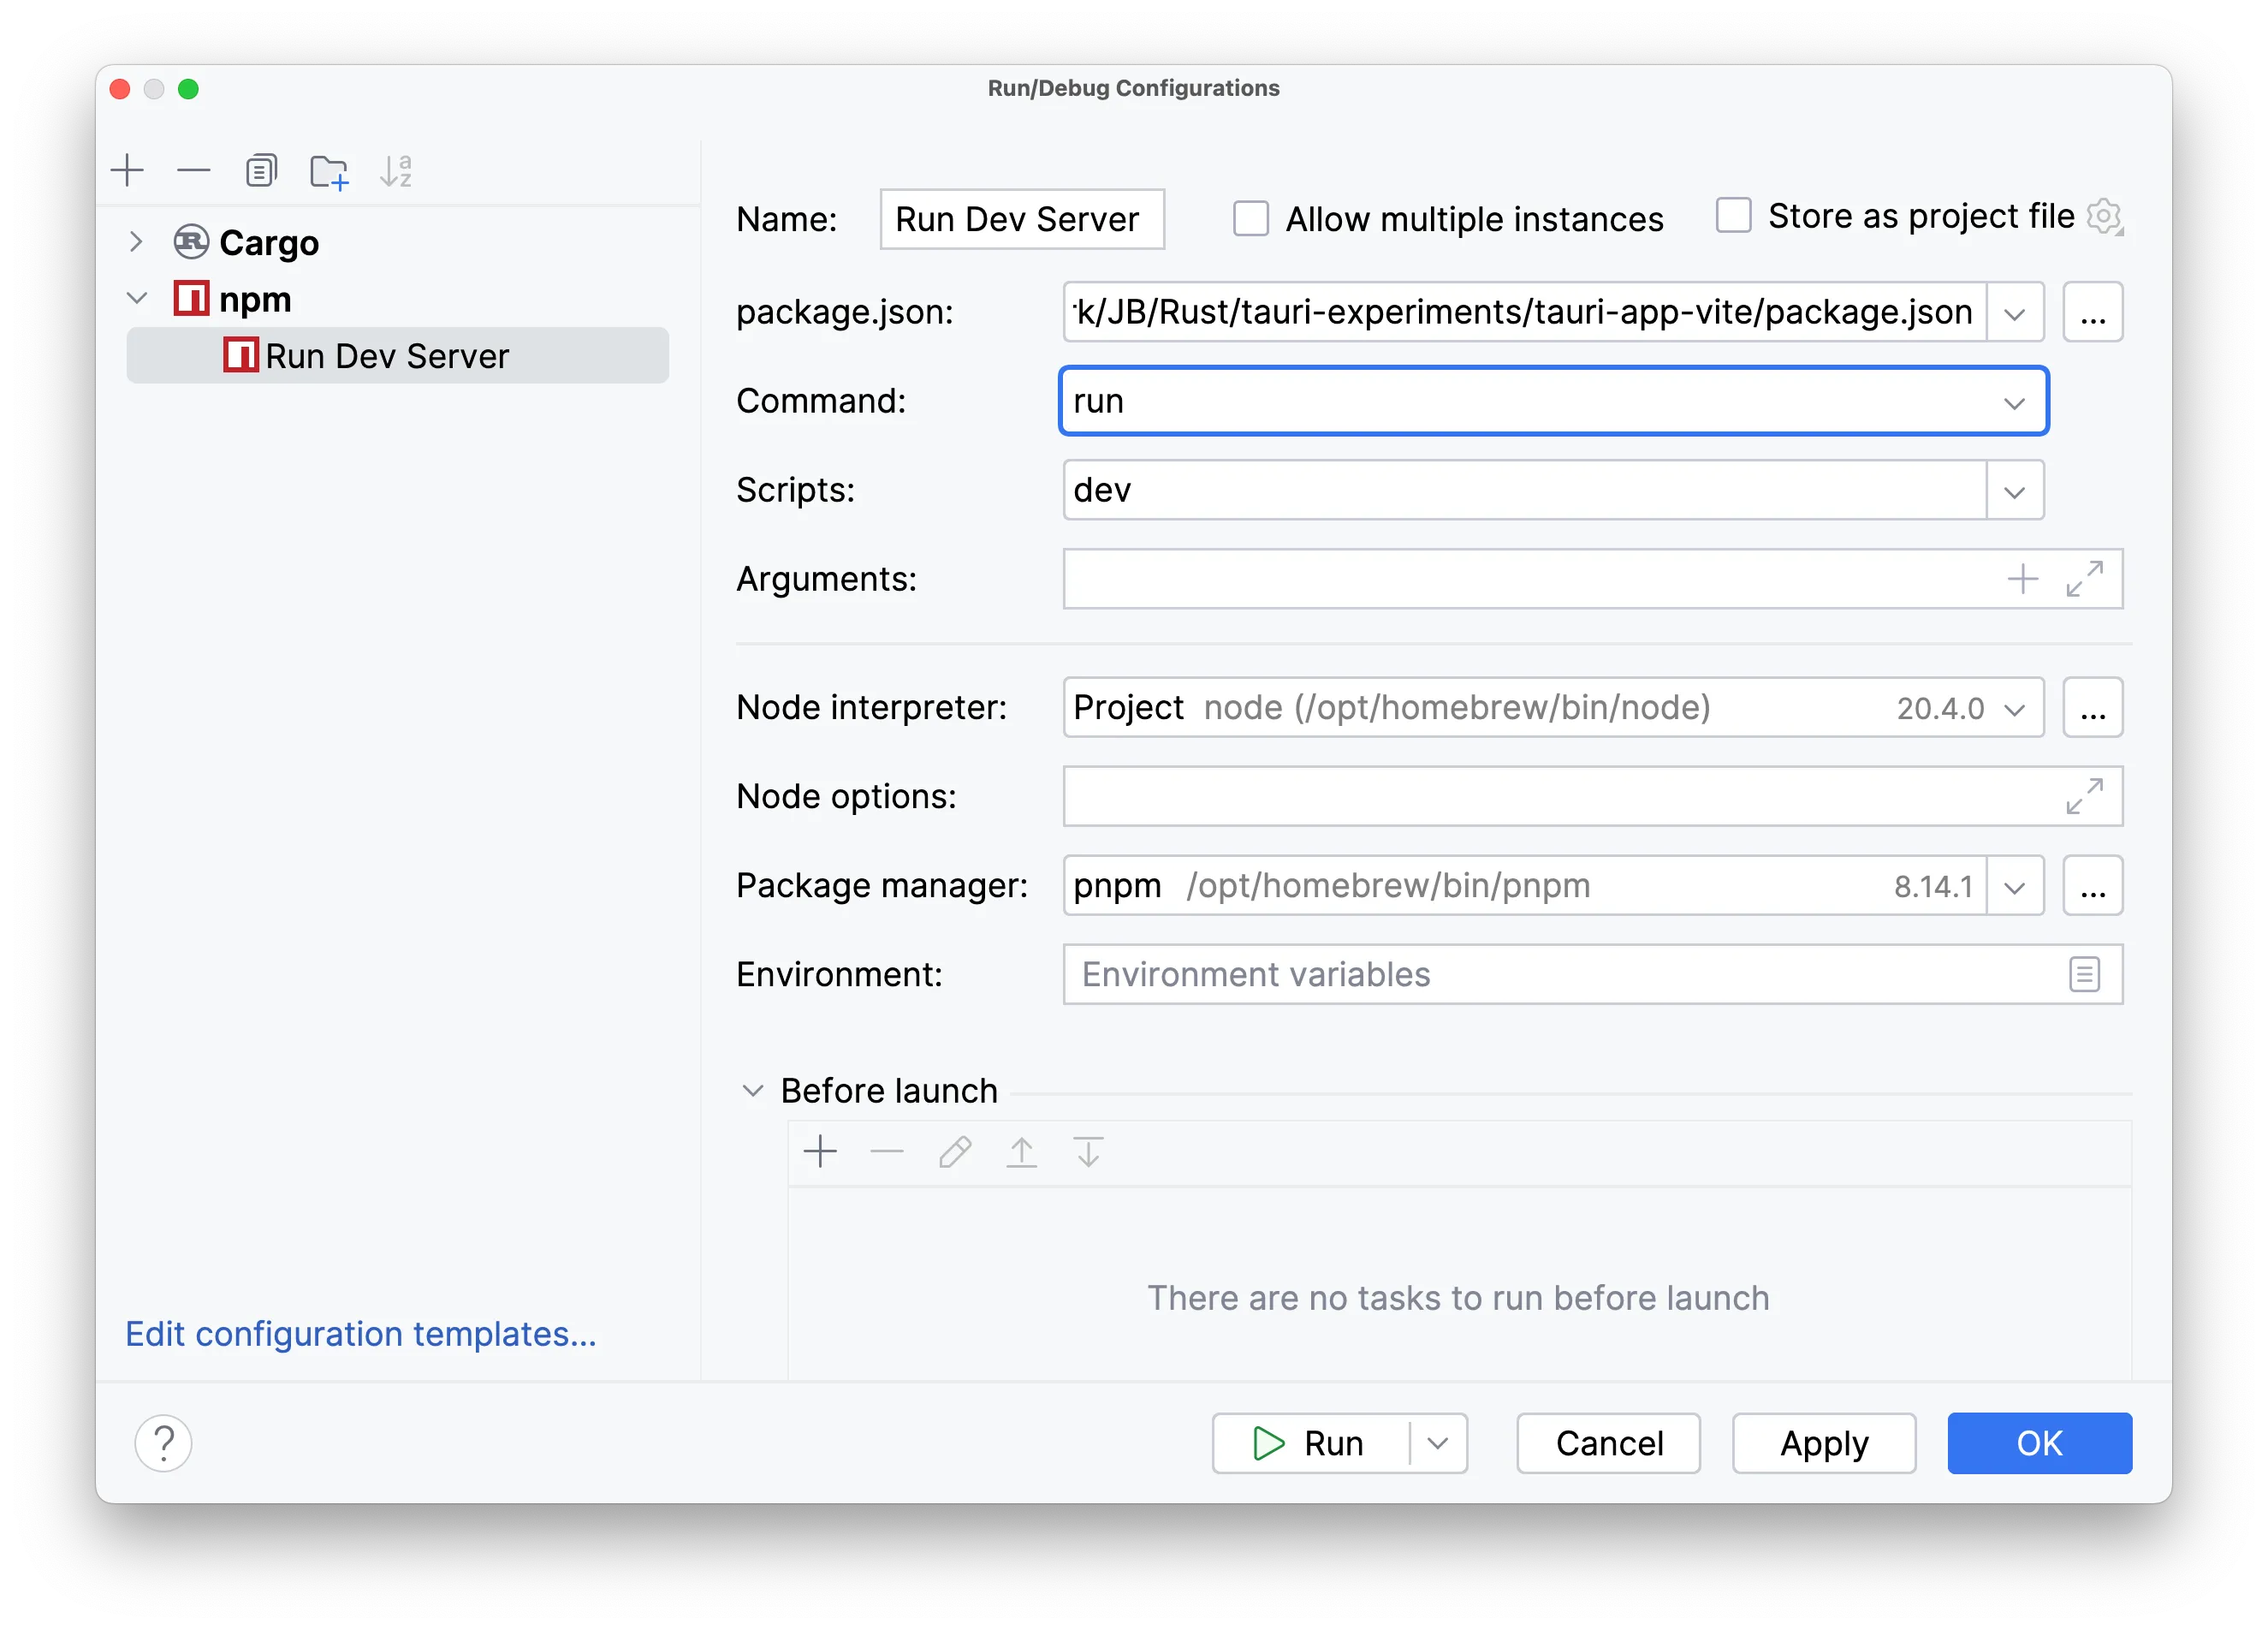
"beforeDevCommand": "pnpm dev"For npm, pnpm, or yarn, you could use the npm Run Configuration, for example:

Make sure you have the correct values in the Command, Scripts, and Package Manager fields.
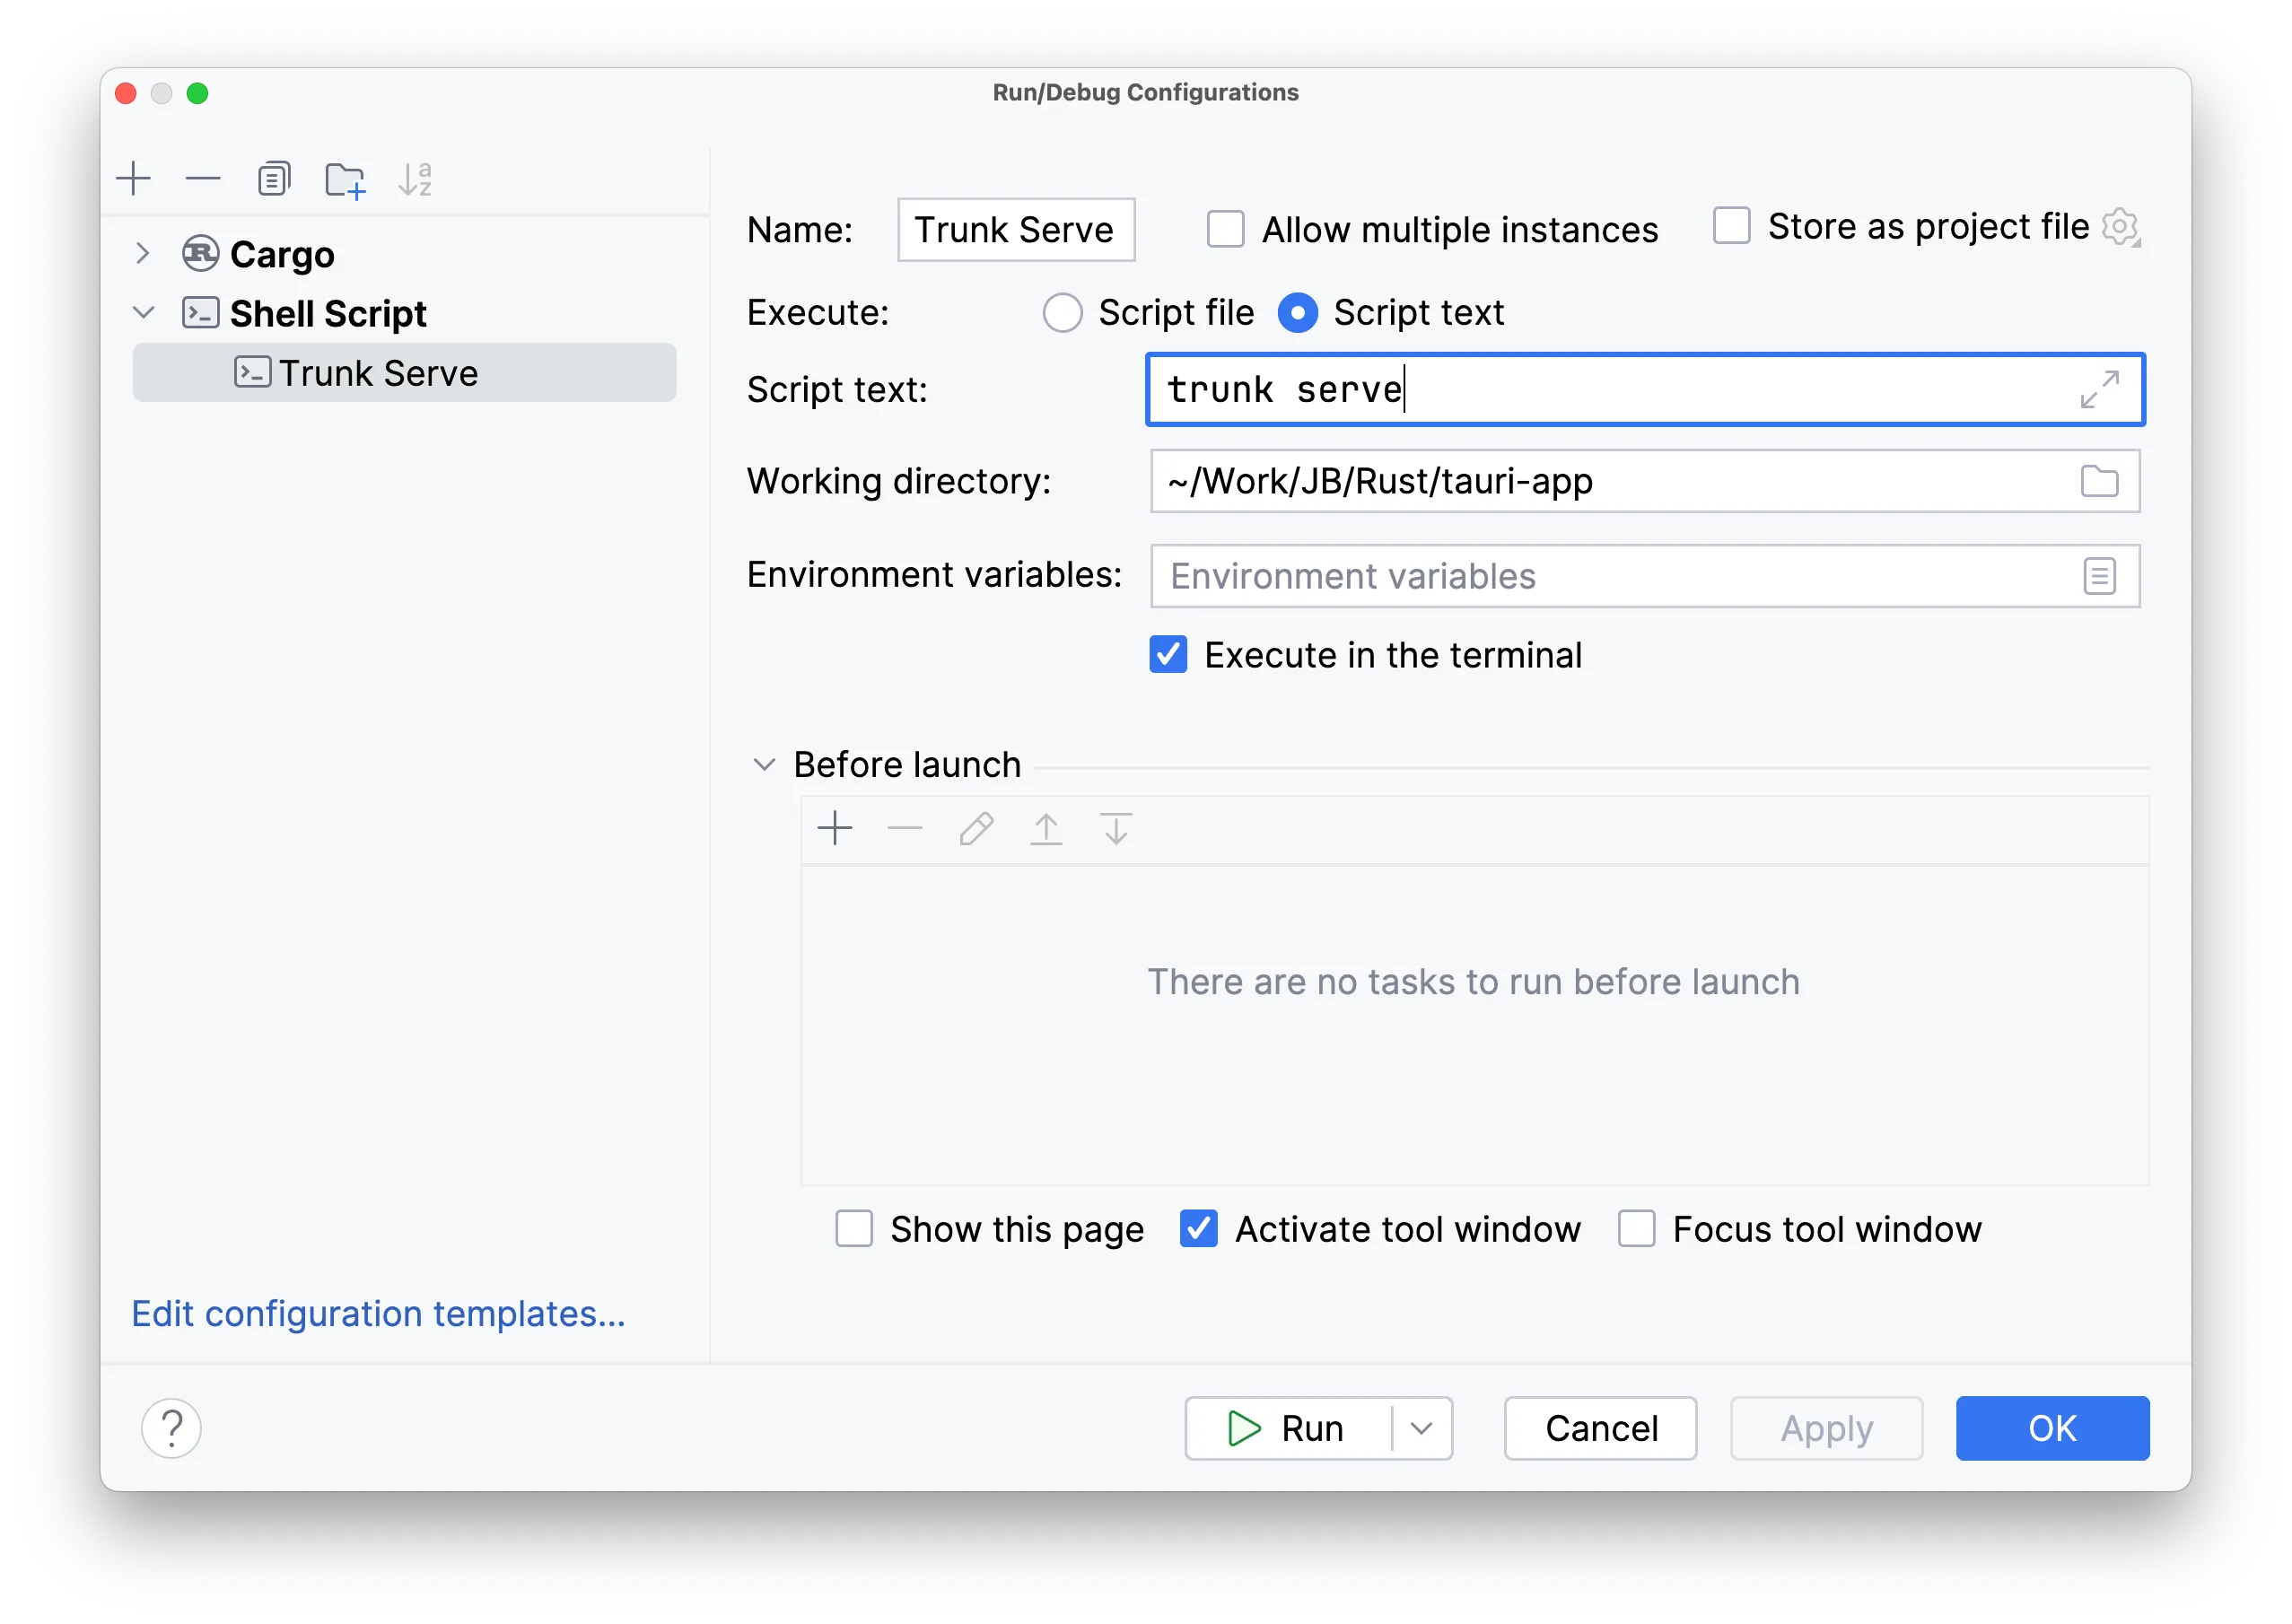
If your development server is trunk for Rust-based WebAssembly frontend frameworks, you could use the generic Shell Script Run Configuration:

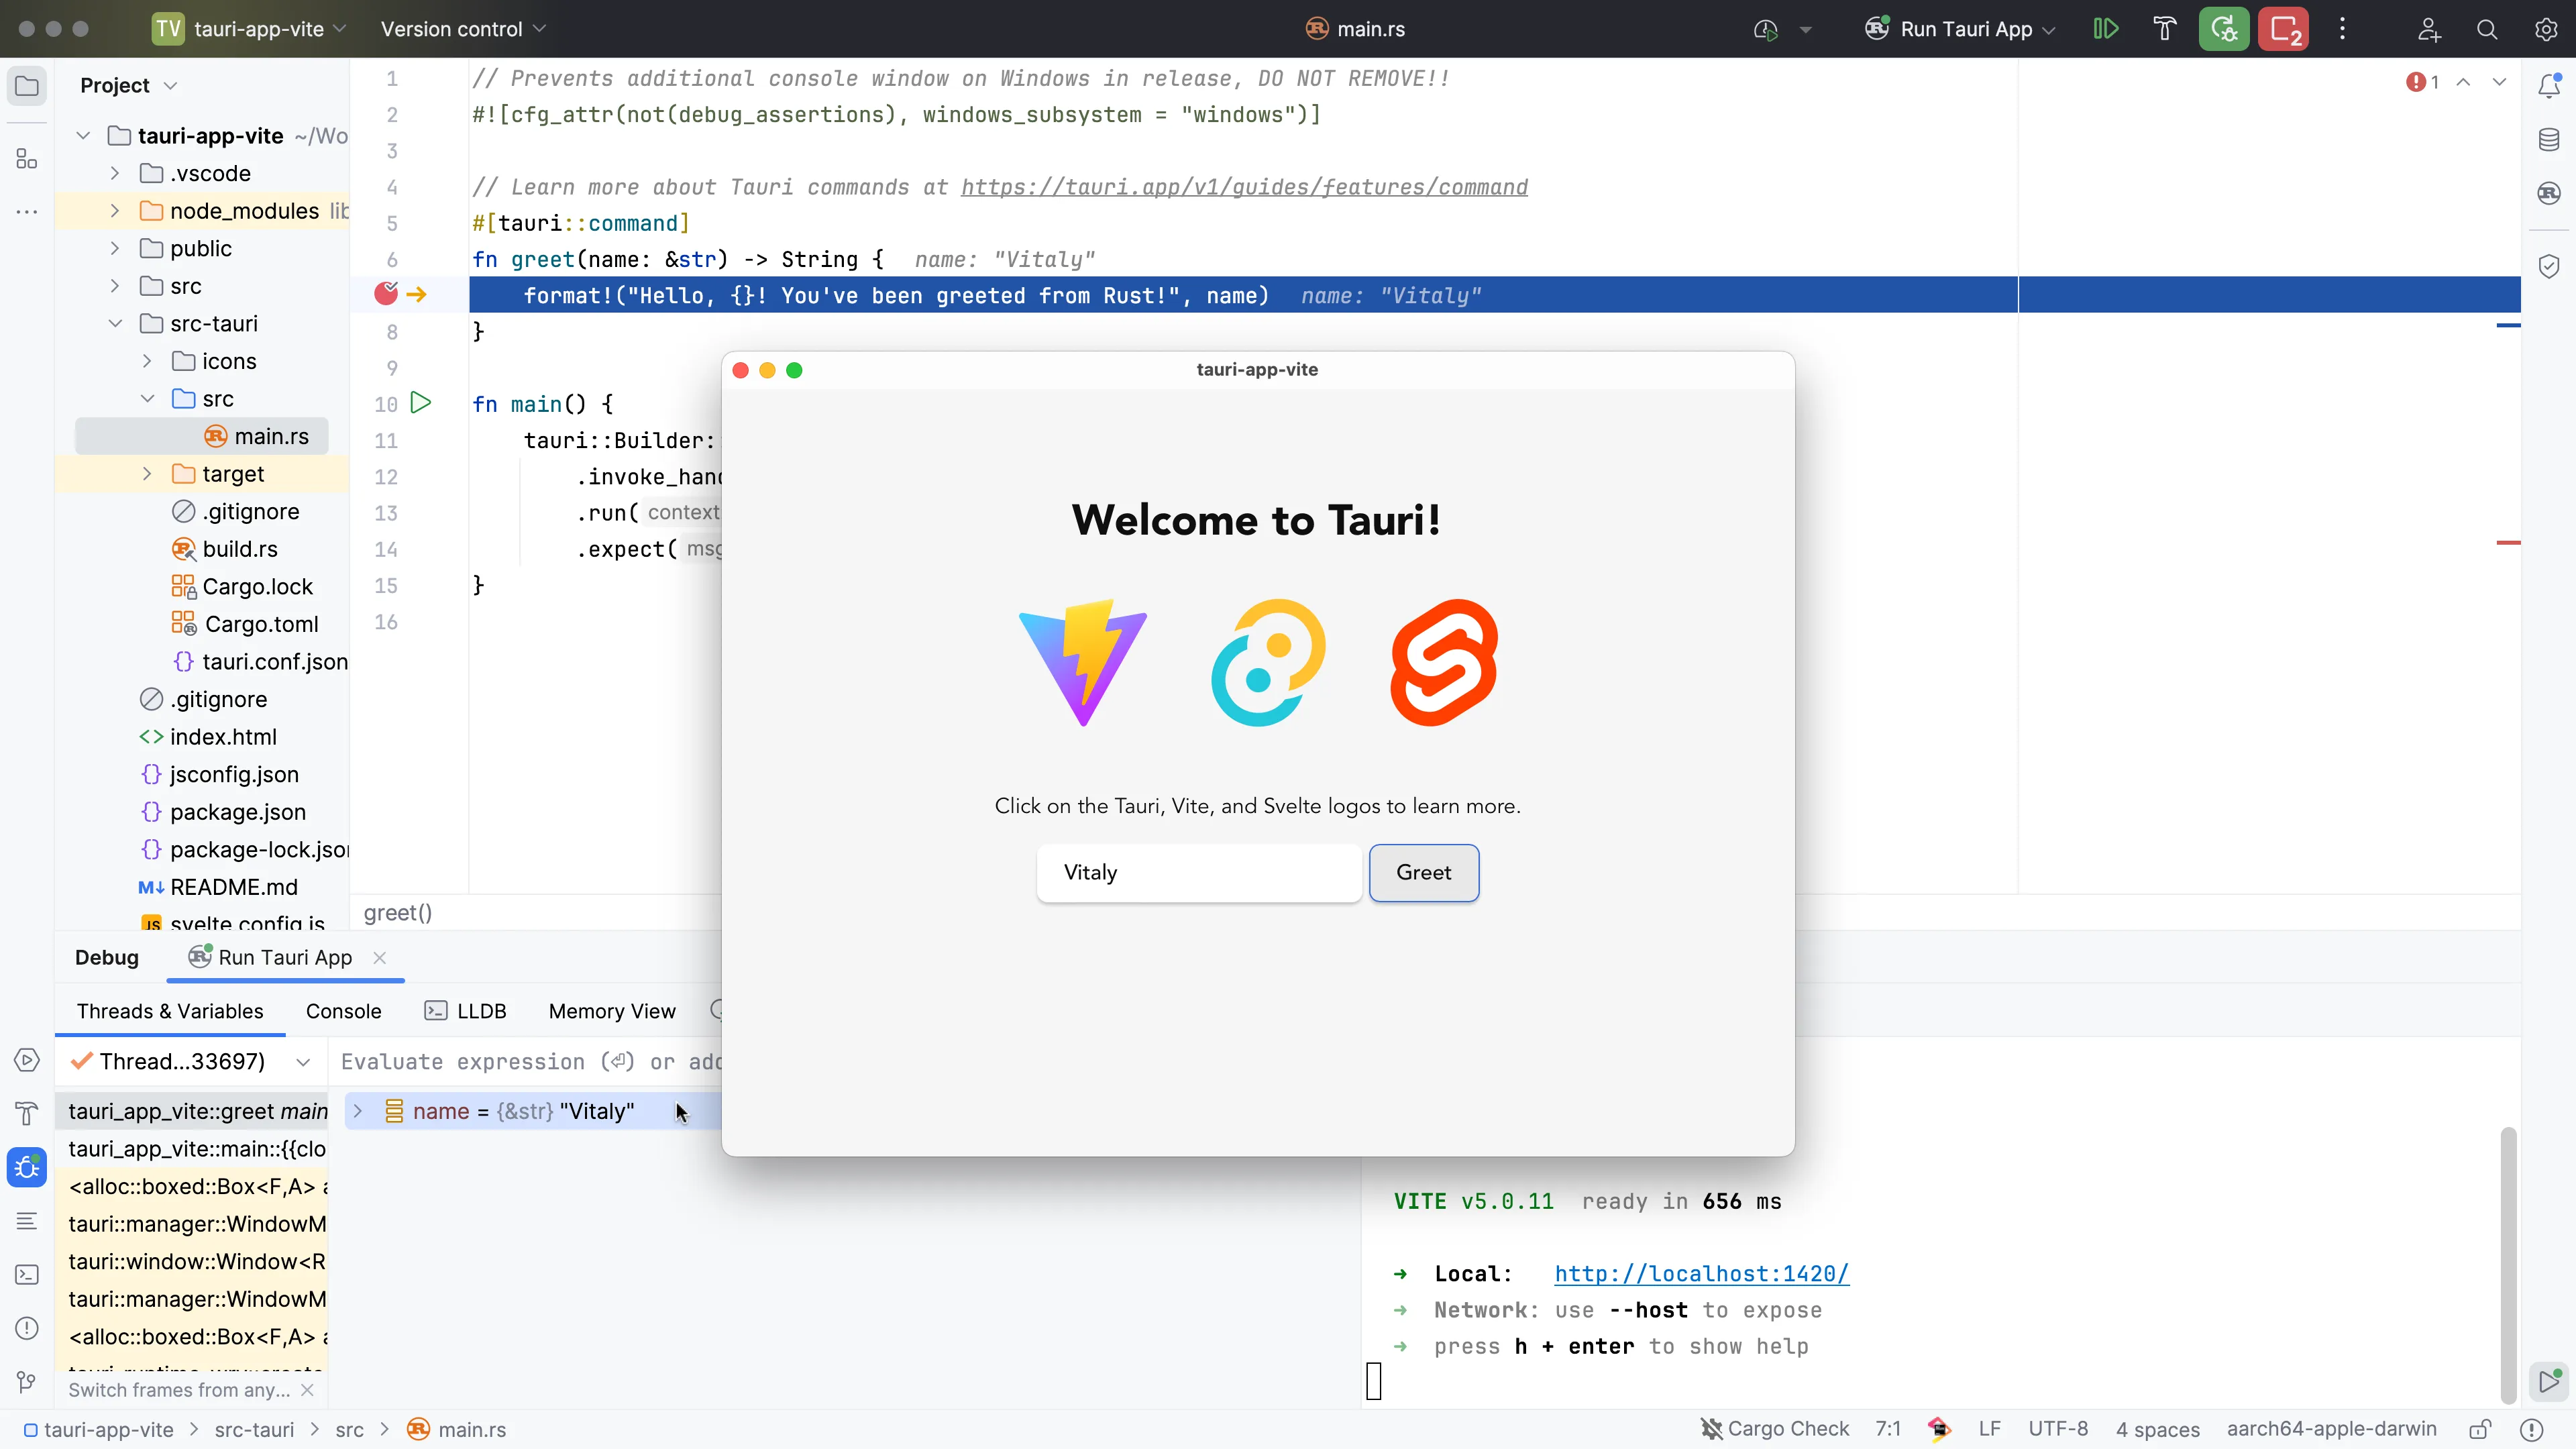
To launch a debugging session, you first need to run your development server, and then start debugging the Tauri App by clicking the Debug button next to the Run Configurations Switcher. RustRover will automatically recognize breakpoints placed in any Rust file in your project and stop on the first one hit.

From this point, you can explore the values of your variables, step further into the code, and check what’s going at runtime in detail.
© 2025 Tauri Contributors. CC-BY / MIT